Tuesday, December 31, 2013
HELLO 2014

Sunday, November 24, 2013
MOLOSSI GIVEAWAY ON THE BLOG

Saturday, October 26, 2013
OCTOBER CHALLENGE AT SASSY SCRAPPERS!

Saturday, October 12, 2013
FIRST TIME ENTERING THIS SKETCH CHALLENGE!

Friday, October 11, 2013
MORE LAYOUTS TO SHARE!!
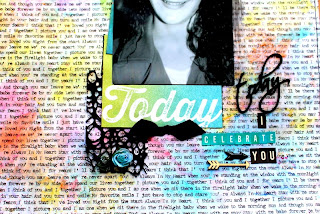
I used Faber Castell Gelatos watered down, texture paste and Simple Stories alphas!
The next layout I have to share is one of my funny sisters Dee and Mia!

My Stuck Sketch for October!
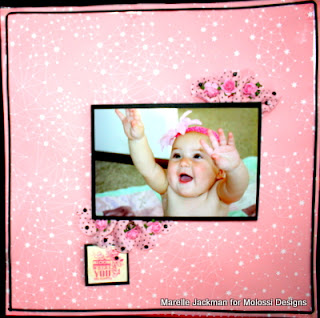
I used A Lil Somethin book pages doilies, Molossi paper flowers,Black Cardstock, Mont Marte Modelling Paste, Prima Tal Dmask Quick Dry Chalk Ink, Heidi Swapp Color Shine Mustard, Amy Tangerine Sketchbook paper, Pilot Black Permaball pen, Simple Stories Vintage Bliss Stickers and alphas, staples.
MORE LAYOUTS TO SHARE!!
I used Heidi Swapp mask, Heidi Swapp Color Shine Mustard, Dylusions Lemon Zest, Dylusions Calypso Teal, Authentique type alphas, American Craft foam alphas, Butterflies from $2 shop.

Friday, October 4, 2013
MY OCTOBER WHITE WITH ONE LAYOUT

Wednesday, September 18, 2013
MORE LAYOUTS TO SHARE
For this layout of Mia I decided to try a watercolour background using Faber Castell Gelatos, water and baby wipes. I love the effect on the patterned paper! I have written a note to Mia and hidden it behind the photo.
I used an old photo taken of three children of scrappers! Leonie Neal-Dawson's daughter Maggie, my youngest daughter Ella and Kerry Murray's daughter Michaela taken at Eastern Beach in Geelong a few years ago.
I used part of APieceofCakeDesigns mini kit, Crafters Workshop brick stencil, Black paint by Derivan from Molossi, Luggage tag I coloured with Dylusions Mists, Imagine stamp by Kaisercraft and Ranger black ink, Faber Castell gelatos, enamel dots.
For this next layout I used Faber Castell Gelatos and baby wipes to blend, Technique Tuesday small cirle stamps, Ranger ink, enamel dots, washi tape, "good times" vinyl embellishment (old from my stash)

MY WHITE WITH ONE LAYOUT

Tuesday, September 17, 2013


Monday, September 9, 2013
LONG TIME NO BLOG......
Just after we had moved in, being knee deep in boxes I journed to The Hunter Valley to attend my second Mojo Retreat - travelling with my beautiful Ebony, we took off for a fun, relaxing, creative 4 day
I have been busy working on DT goodies for Molossi - when I received a shadow box with my DT monthly box of goodies, I thought I would keep the design simple, and use it as an interchangeable home décor piece - for either 9x9 layouts or photos!
Products I used: Molossi shadow box, Derivan black paint - Molossi, Pritt Gel Glue, Fabric Flowers from Molossi, Mont Marte modelling paste.
I had fun altering this letter "Y"! I used black and white chevron washi tape, Tiny Koala Craft paper roses from Molossi, black and white twine, and words cut from patterned paper.

Sunday, June 2, 2013
MY RECENT LAYOUT USING MOLSSI PRODUCTS
Sunday, May 26, 2013
ELLA GETTING CREATIVE ON A SUNDAY!
Ella's galaxy tee shirt - looks fabulous - a great way to spend a Sunday afternoon!

Saturday, May 25, 2013
MY LATEST PROJECT FROM MOLOSSI DESIGNS!!
I am renaming this
gorgeous Molossi MDF tree The Tree of Love, or The Tree of Hearts!!!
Products used : from
Molossi: The Love Tree: Derivan Matisse Transparent Gesso
Student fine art
white paint by Global
Student fine art red
paint by Global
Modelling Paste
Chroma Student
Arcylic paint in Magenta
Tim Holtz typewriter
words
These trees can be
used in many ways: paint them pink or blue and use them for guests to sign for
Baby’s First Birthday!
They can also be
painted white for wedding table centrepieces – or as “money trees at a wedding”
They would also make
an amazing 21st present painted in the fave colour of the birthday
boy or girl
They would also be
fabulous for a Christening, Baby Shower, Mother’s Day Present – the list is
endless!
I am going to mix
media the tree and show you how easy it is to make it look a little different!!
I mixed some Derivan
Matisee Transparent Gesso Pastel Primer with some white Student paint and gave
the tree 2 coats of this mixture : remember to paint both sides!
Next I mixed some
Global Student impasto paint in red with some Global white and made a pretty
pink colour. I coated the tree twice in
this colour.
Next I took my old
favourite some modelling paste and mixed it with some bright pink paint.
I dabbed this mixture
all over my Love Tree and left it to dry.
I love the effect :
it looks like floaty fairy floss! By using the Modelling Paste it has given the
tree depth and of course my favourite word texture!
Next I took Tim Holtz
typewriter positive words and randomly placed them over the tree on both sides.
Next I used some very
fine white craft ribbon and tied bows on either side of the tree, again randomly.
I imagine this tree
to be the centrepiece of a lolly buffet at a Birthday Party for a baby Girl
turning 1!
What a beautiful
keepsake for years to come.

Subscribe to:
Comments (Atom)


